
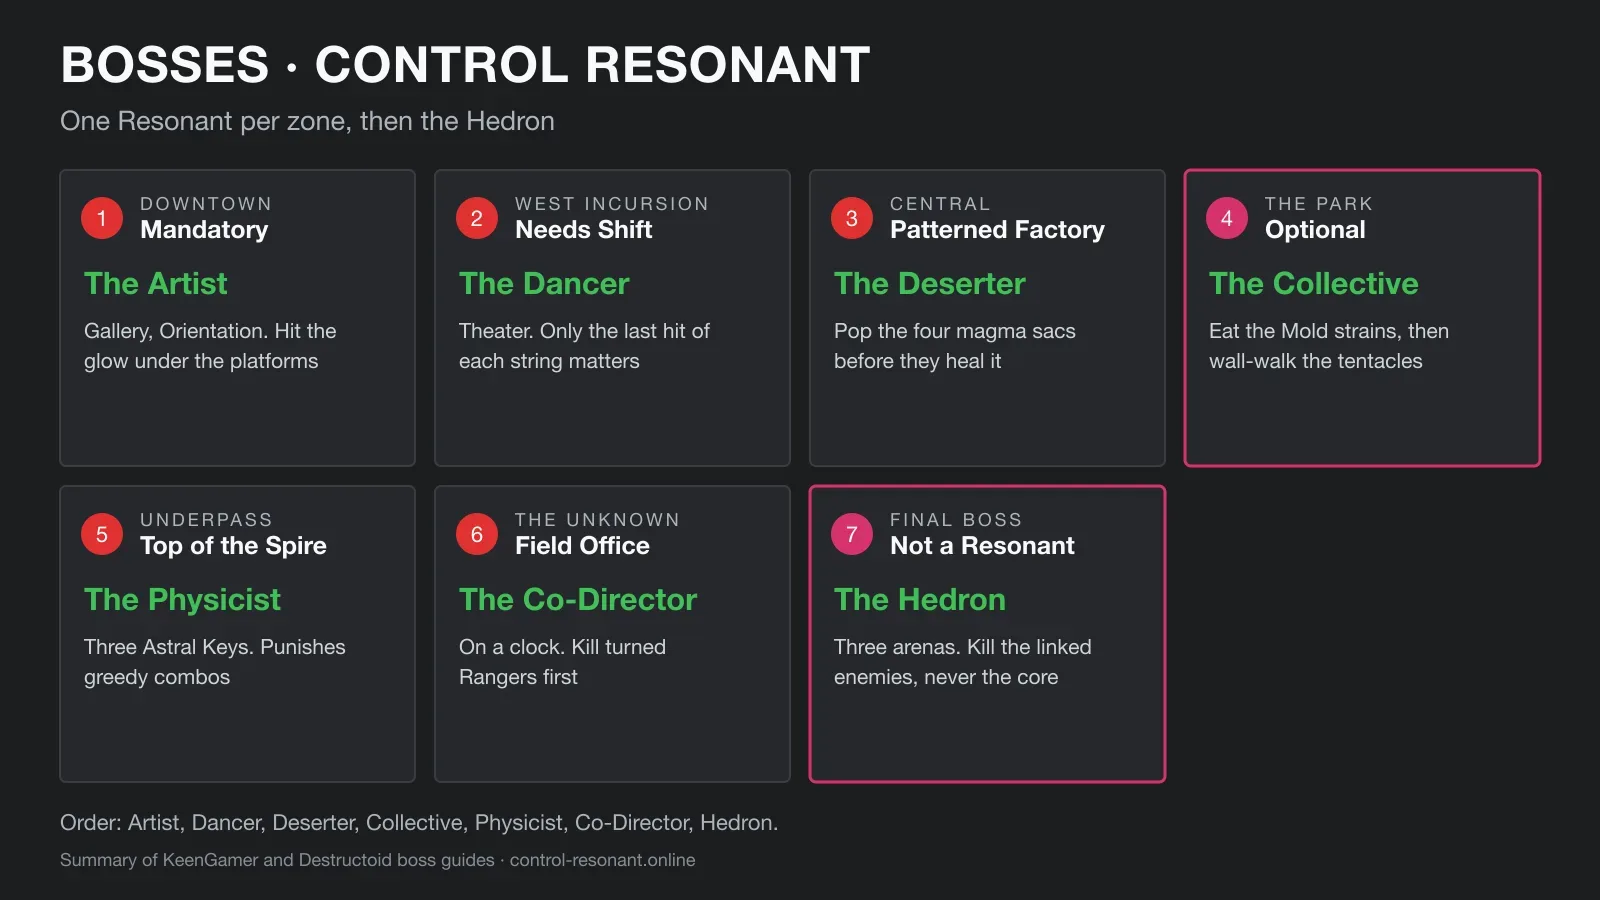
Every boss at a glance
| Boss | Where | Needs | Pays |
|---|---|---|---|
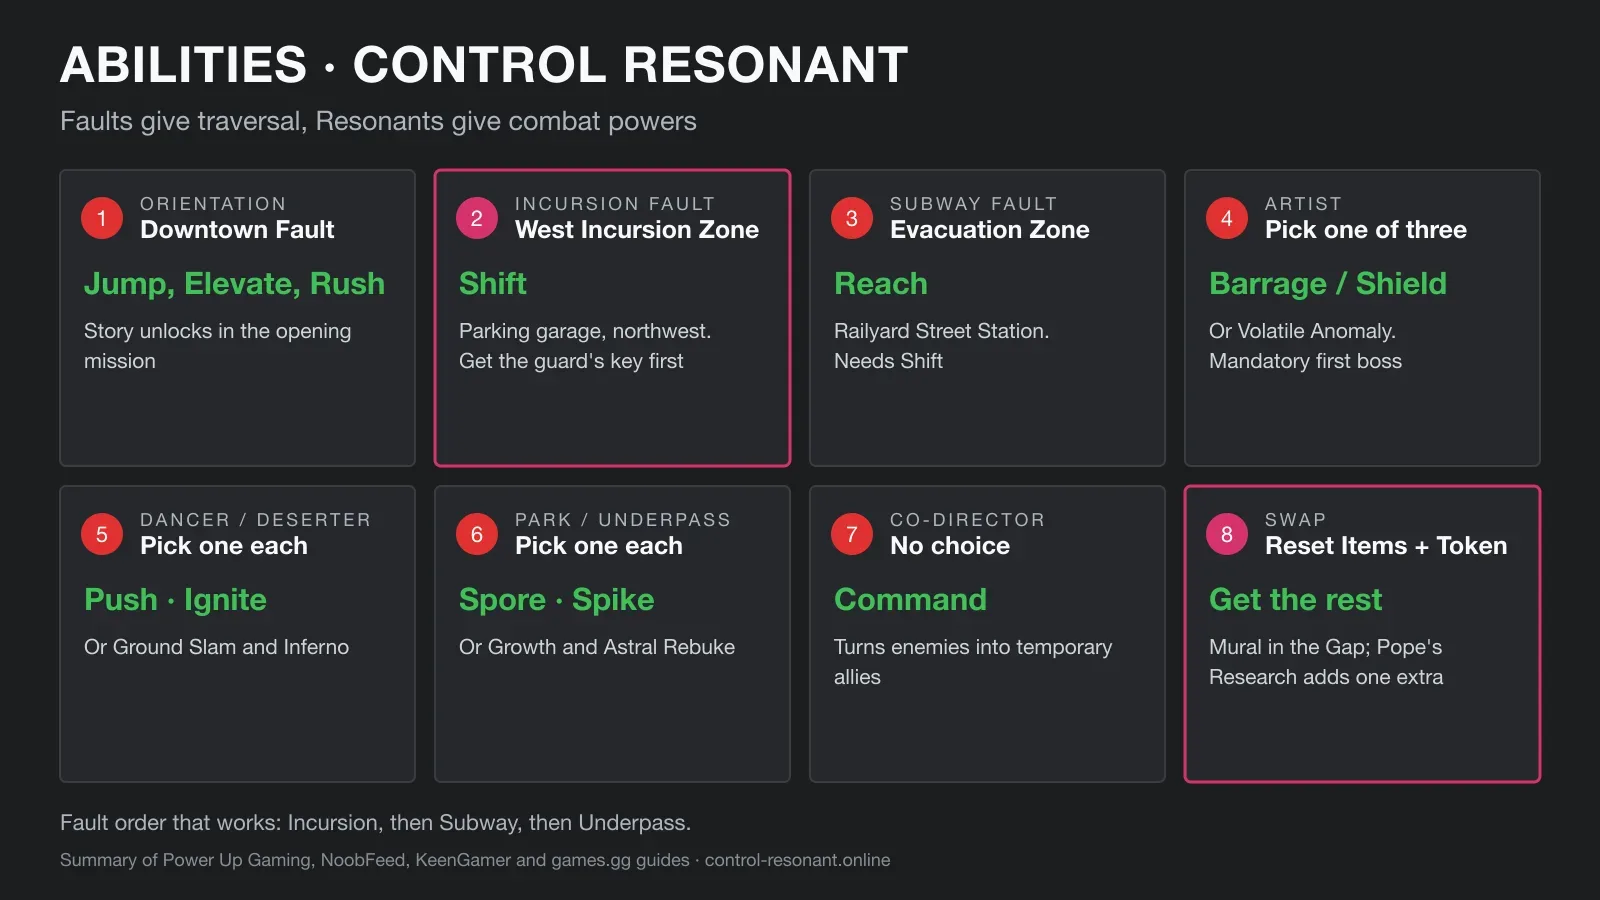
| The Artist | Downtown gallery (Orientation) | Nothing; mandatory | Barrage / Volatile Anomaly / Shield, 2 Reset Items, 1,000 Source |
| The Dancer | West Incursion Zone, Theater | Shift | Push / Ground Slam, 2,000 Source |
| The Deserter | Central, Patterned Factory | Nothing | Ignite / Inferno, 3,000 Source |
| The Collective | Beneath the Park, Mold Gate | Eat the Mold strains | Spore Burst / Growth, 3,000 Source |
| The Physicist | Underpass, top of the Spire | Shift + three Astral Keys | Spike / Astral Rebuke, 3,000 Source |
| The Co-Director | The Unknown, Field Office island | Pope’s Research | Command, 4,000 Source |
| The Hedron | Far west of the Unknown | Rebuild, then Fight the Core | Living Shard, Silver trophy |
Rewards are from KeenGamer. Each Resonant except the Artist also drops one Reset Item and an Untapped Artifact. What each power does is on our abilities page.
Downtown, West and Central
- The Artist: the door at the back of the Downtown gallery after the first Jesse ritual. It throws cars and rock waves, then floats in phase two. Jump to the platforms and hit the glowing spot underneath to bring it down.
- The Dancer: after the Incursion Fault gives you Shift, climb past the EMPIRE sign and through a subway tunnel to the Theater. Most players miss the balcony jump to the scaffold. Only the last hit of each string is dangerous, so dodge it and punish.
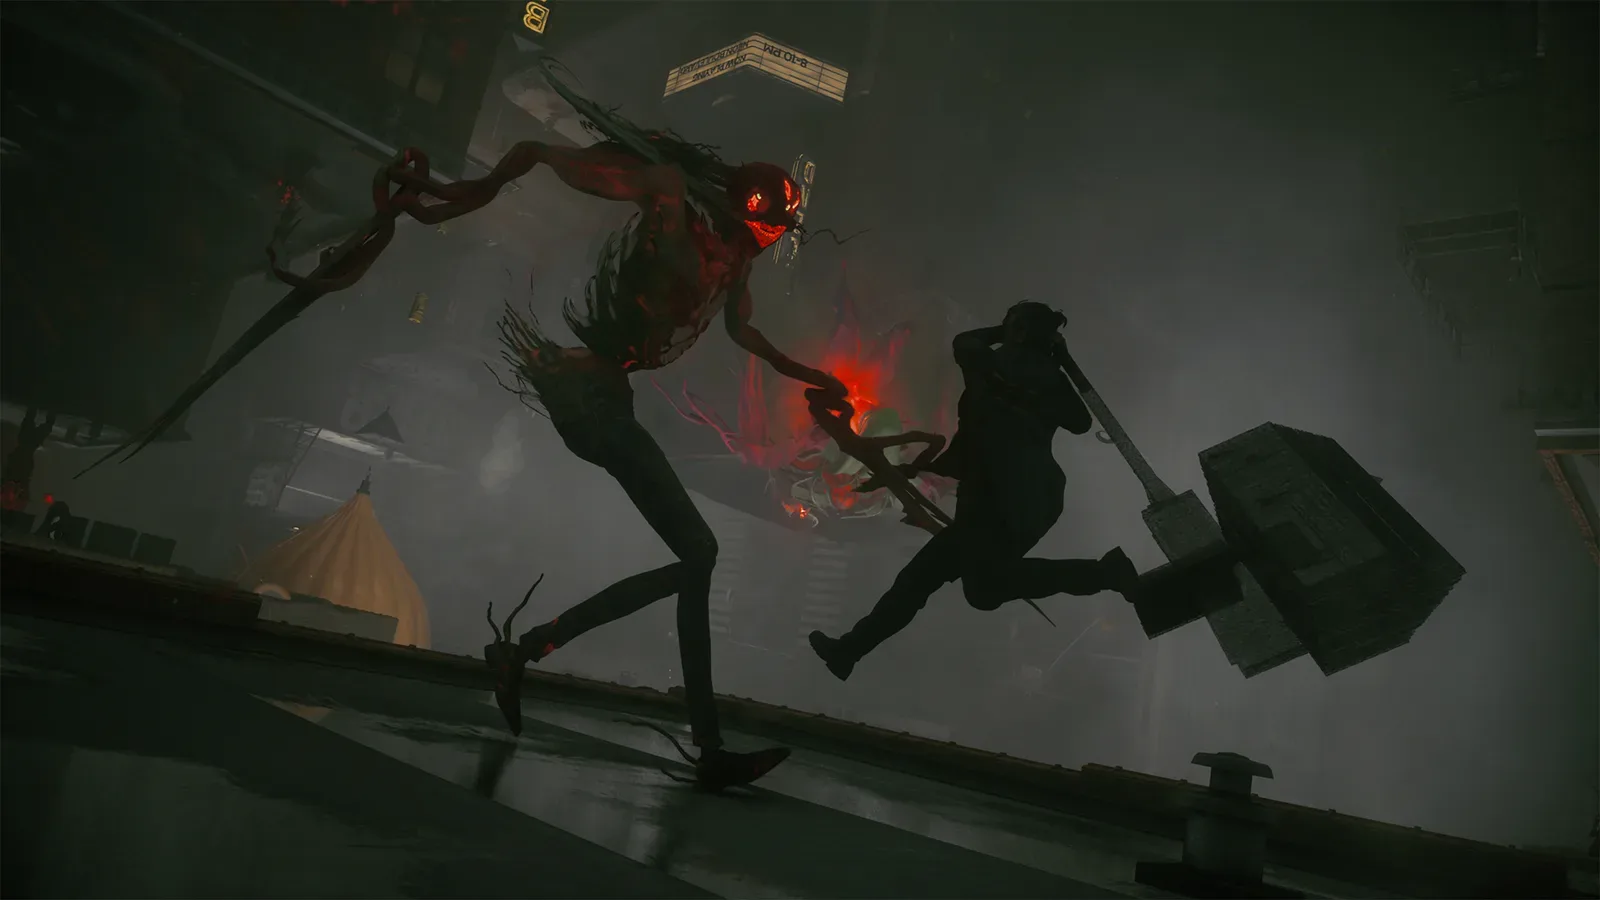
- The Deserter: inspect the eye on the pipes, take the elevator down from the roof, break three heat growths and cross the flame corridor. At a third of its health, four magma sacs heal it; pop all four first. Full fight: the Deserter boss.
If you haven’t done the Incursion Fault yet, KeenGamer says the Deserter and the Dancer can swap places in the order.
The Park: the Collective (optional)
Enter the Park through The Park Checkpoint in Central’s northeast corner. The Collective is the only Resonant with no part in the story, but you need it for Casual Outfit: Resonants and the Gold trophy for clearing every zone.
- Open the Mold Gate: KeenGamer says to eat the three Mold strains at the Pizzeria, Minimart and Gym. Destructoid starts at the New Mold Strains point of interest east of the café and has you eat that one plus three more.
- The fight: ignore the central body. Use Shift to walk the walls and destroy the tentacles one by one, then hit the exposed weak points and clear each Mold wave. Fire is the recommended damage type.
The Park is also where New Growth and Carbon Copy play out, and where the Vesey lab is (Testing Facilities).
The Underpass: the Physicist
The Physicist opens through the main mission Recursions and Iterations and is fought on the Astral Plane at the top of the Spire. You need Shift and all three Astral Keys, each on a floating island.
- It charges area explosions and throws debris volleys. Circle wide instead of backing straight up.
- Jump the ground sweep, and kill its summoned minions before they stack up.
- KeenGamer: it “punishes greedy combos more harshly than any earlier boss.” Take two or three hits’ worth of openings, not full strings.
The Underpass also holds the Jesse Sighting Fault (it needs Reach) and the bulbs for Maintenance Protocol.
The Unknown: the Co-Director
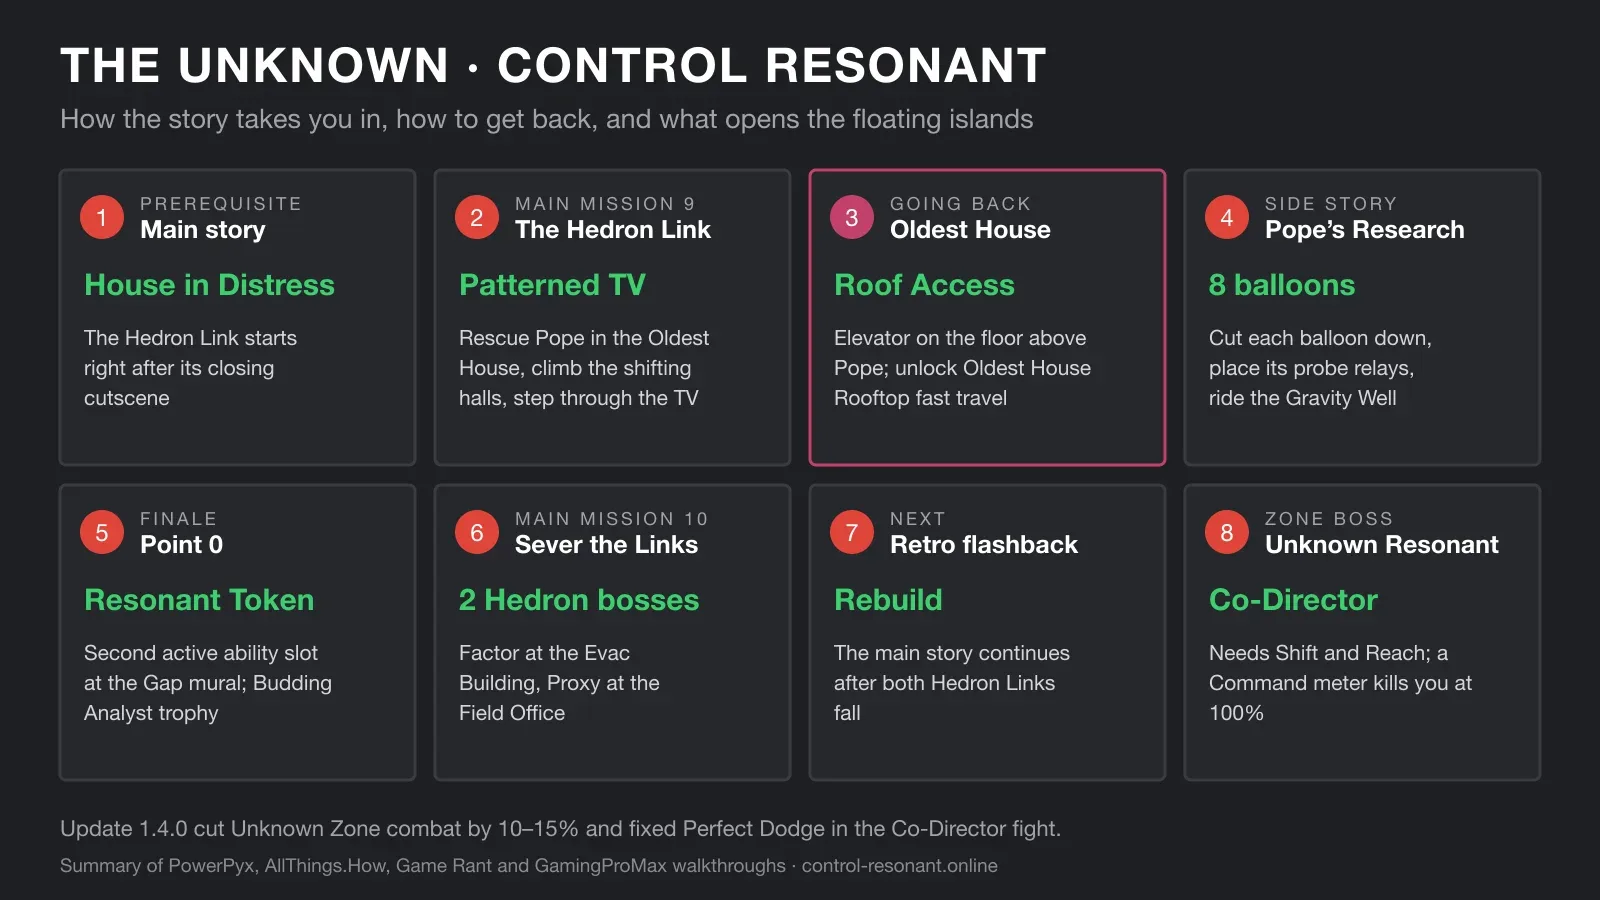
It opens during Sever the Hedron Links. Finish Pope’s Research to spawn the Gravity Wells, then work through the shed, power cube and gate puzzles and survive the plaza ambush. The route is on our Unknown guide.
- It is the only Resonant fight with a clock: a Command meter fills as you fight.
- Kill turned Rangers first, dodge the purple beam sideways and back off when the ring contracts.
- The reward is Command, with no choice, plus the most Source of any Resonant.
Final boss: the Hedron
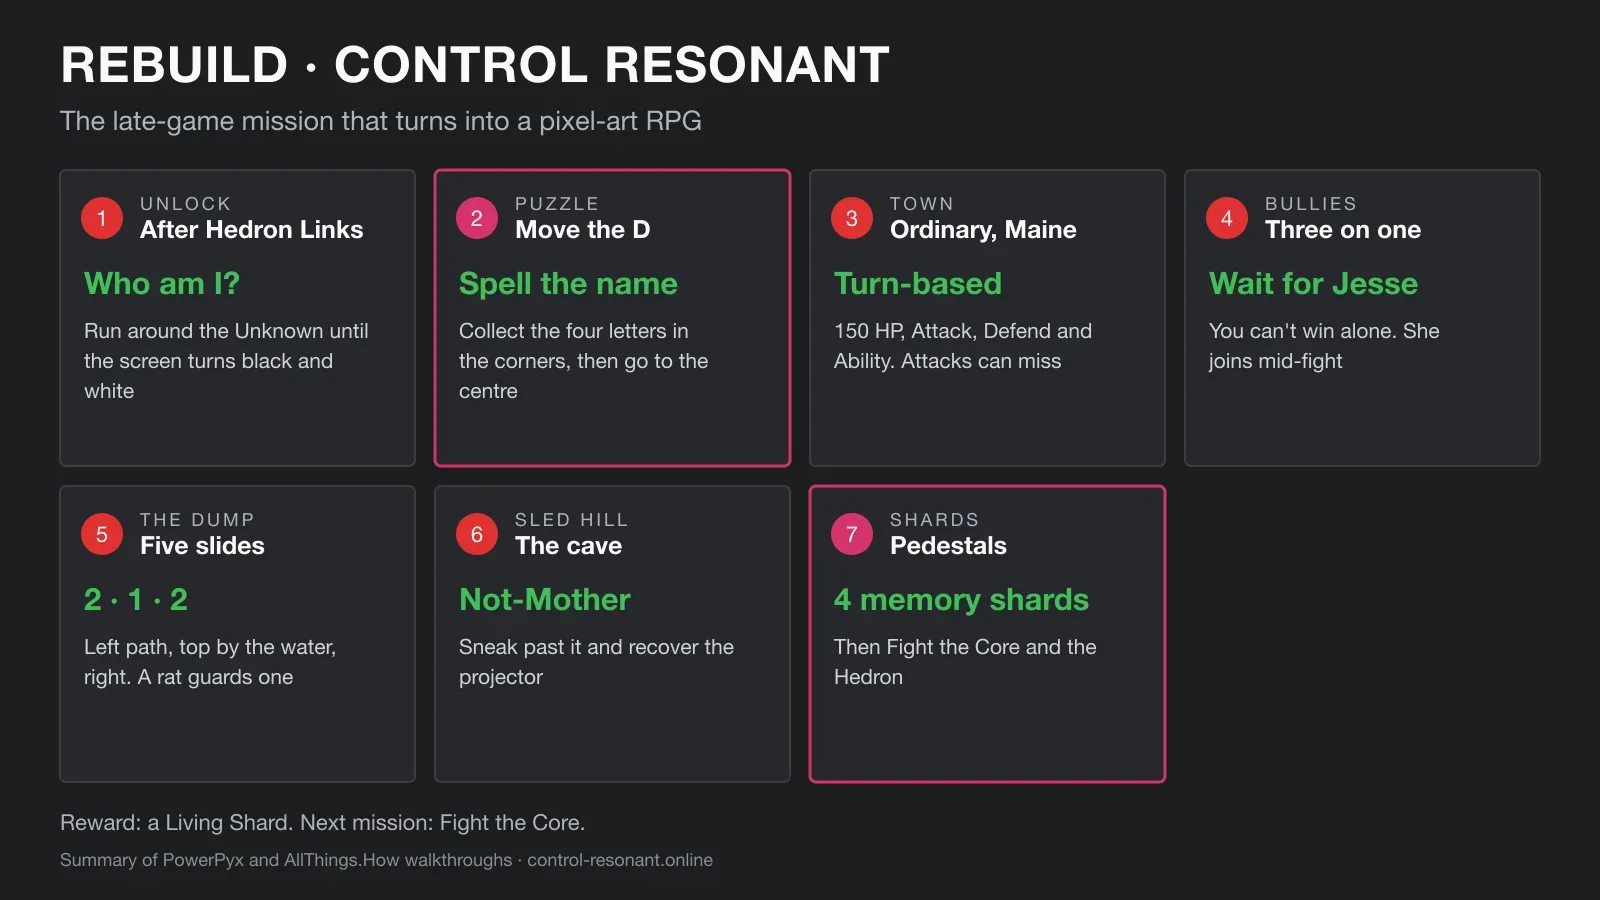
After Rebuild, Fight the Core takes you through the northwest Gravity Well to the far west of the Unknown. The Hedron has three arenas with a health bar each, and you never hit it directly: kill the linked enemies to drain each bar. You need Reach and Shift for the split arenas. It pays an Untapped Worn Eraser, a Living Shard, a Reset Item and a Silver trophy.
What happens after it is in the spoiler section of our story explainer.
Bosses FAQ
How many bosses are in Control Resonant? Six Resonants, one per zone: the Artist, the Dancer, the Deserter, the Collective, the Physicist and the Co-Director. The final boss, the Hedron, is not a Resonant.
Which Resonant is optional? The Collective in the Park. It plays no part in the story, but you need it for the Resonant outfit and the full set of combat abilities.
What is the hardest boss in Control Resonant? Destructoid calls the Co-Director in the Unknown the hardest. It is the only Resonant fight with a clock: a Command meter fills during the fight.
Where is the Underpass boss? The Physicist waits on the Astral Plane at the top of the Spire. It opens during Recursions and Iterations and needs Shift plus three Astral Keys from the floating islands.
Sources
- KeenGamer — Control Resonant all bosses, locations and how to beat them
- Destructoid — All Resonant locations in Control Resonant and how to find them
- Power Up Gaming — Every ability in Control Resonant and how to unlock them
- KeenGamer — All Dimensional Fault locations and traversal abilities
- TechWiser — Control Resonant main and side quests
Related guides
 DiagramGuidesControl Resonant Abilities: Every Power and How to Unlock ItRead guide
  Official · RemedyGuidesControl Resonant: The Deserter Boss, and the "Underwhelming" LabelRead guide
  DiagramGuidesControl Resonant: How to Get to the Unknown (and Get Around It)Read guide
  DiagramGuidesControl Resonant Rebuild WalkthroughRead guide